Basic Info
This chapter covers the first step in creating a dance event.
Form Fields
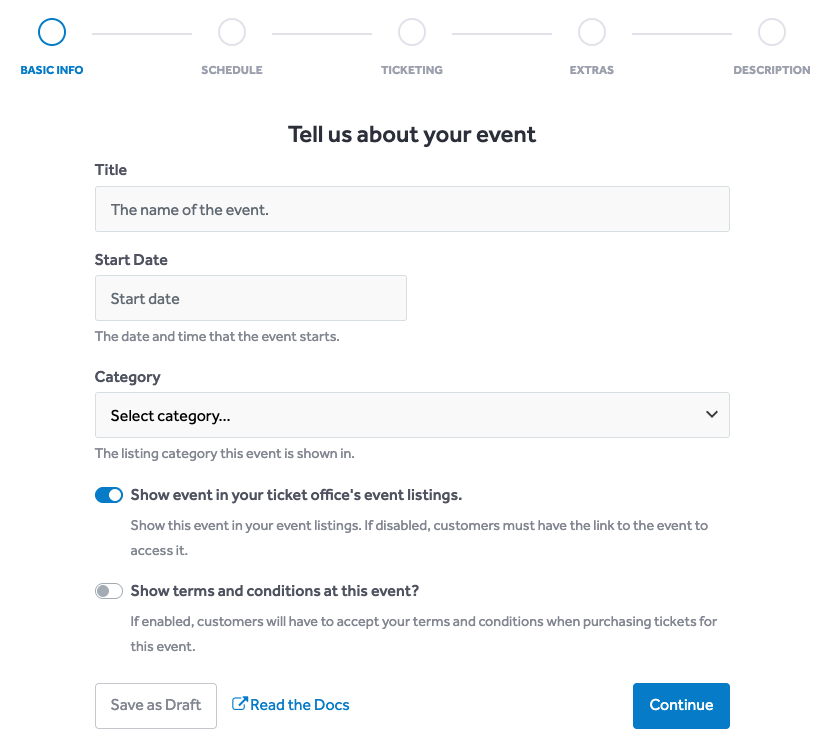
The form on this step collects some initial information about your event.

Title
This is the title shown to customers when listing your event.
Start Date
Enter the date and time that your event starts. This can either be the date and time when your event starts, or the date and time when doors open.
TIP
There is no option to enter the date and time your event finishes. The end of your event is calculated from your event's schedule.
We'll cover the schedule in the next chapter.
Category
Select a listings category for your event. This helps customers find your event when browsing events on DanceCloud.
You can choose from the following categories:
- Balls - Formal social dance events, typically with a theme or for a special occasion.
- Classes - Regular dance classes, for example weekly or fortnightly classes. Attended by your local community of dancers.
- Courses - A series of dance classes, typically over a few weeks, for example a 4-week improvers course. Typically attended by your local community of dancers.
- Exchanges - Large social dance events where dancers from different scenes (national and/or international) come together to dance.
- Festivals - Multi-day dance events, typically with a variety of workshops and social dancing. Draws dancers from a national and/or international audience.
- Social Dancing - Regular social dance events, for example monthly socials. Attended by your local community of dancers.
- Weekenders - Multi-day dance events, typically combining social dancing and workshops. Draws dancers from your local community of dancers and wider - for example, other regional scenes.
- Workshops - Dance events focused on learning. Attended by your local community of dancers and perhaps wider - for example, other regional scenes.
Hiding the Event
By default, the "Show event in your ticket office's event listings" toggle is activated. This means customers will be able to see this event in your event listings on DanceCloud once it is published.
If you do not want to list this event, turn the toggle off. This means that customers will need the link to your event to purchase tickets.
Terms & Conditions
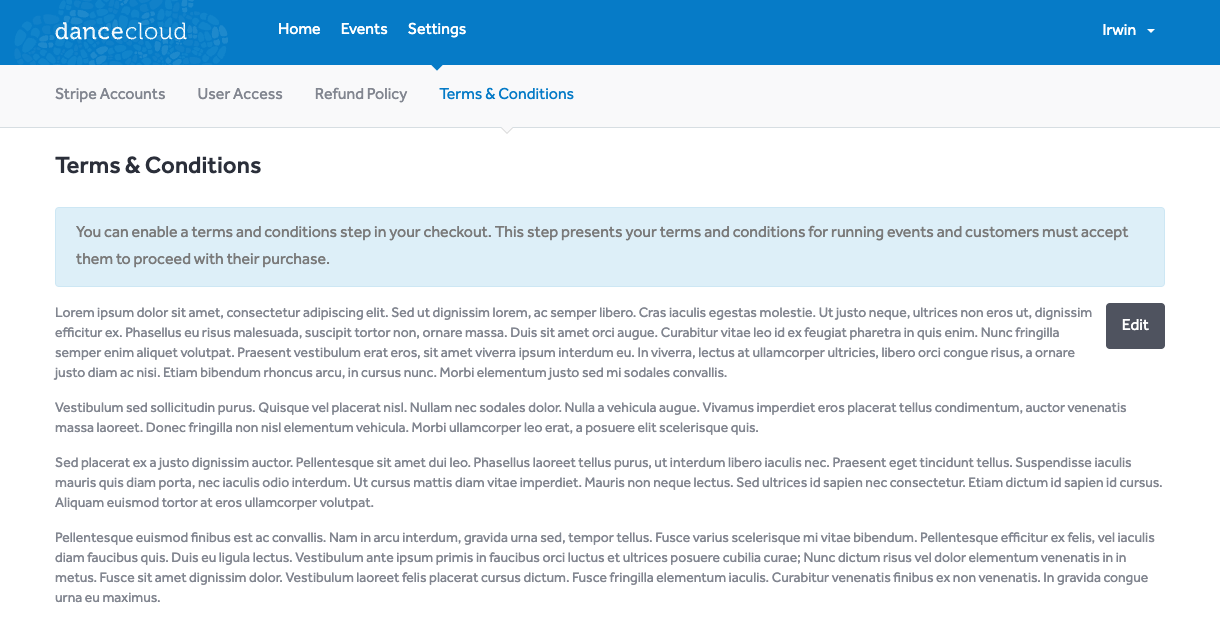
You can optionally enable a Terms & Conditions step in your checkout process. If enabled, customers will be shown your terms and conditions before purchasing tickets, and must accept them to proceed with the purchase.
Use the toggle to turn this feature on.
If you do turn it on, ensure you have entered your terms and conditions in your account settings. You can access this from the top-level Settings menu, as shown below:

What's Next?
On the next step, we'll create your event's schedule. Use the Continue button to proceed to the next step.