Managing Applicants
In this chapter we cover how to manage applicants on the wait-list.
Your Wait-List
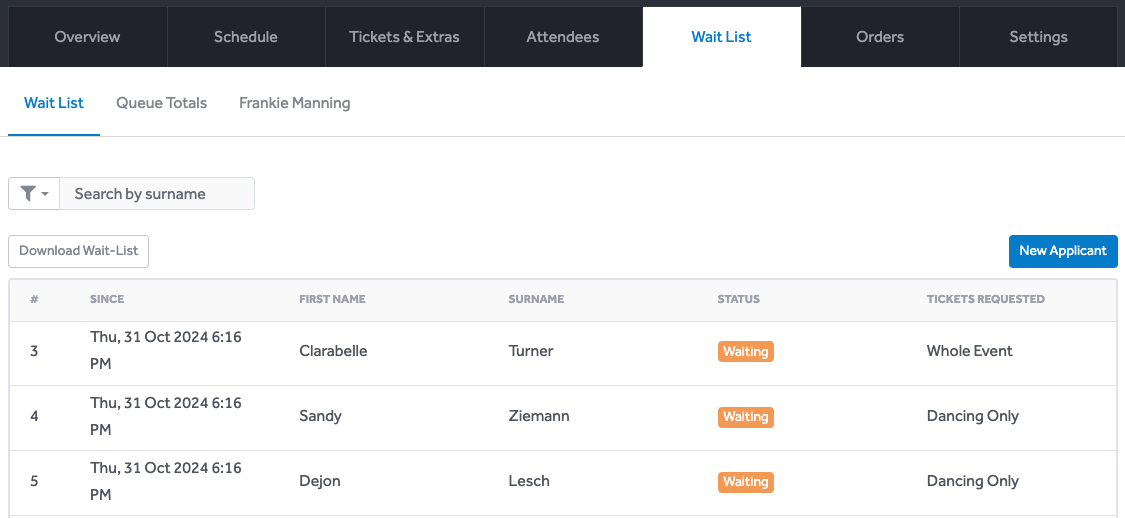
To view the applicants on the wait-list, navigate to the event page in your organiser account and click on the Wait List tab. Here you will see a list of applicants on the wait-list:

Adding Applicants
To add a new applicant to the wait-list, use the blue New Applicant button on the top-right of the wait-list. You will need to enter:
- the applicant's name; and
- their email address.
Once you've submitted those details, you'll be taken to the applicant's page. Next, you'll need to specify the tickets they are requesting as described below.
Editing Details
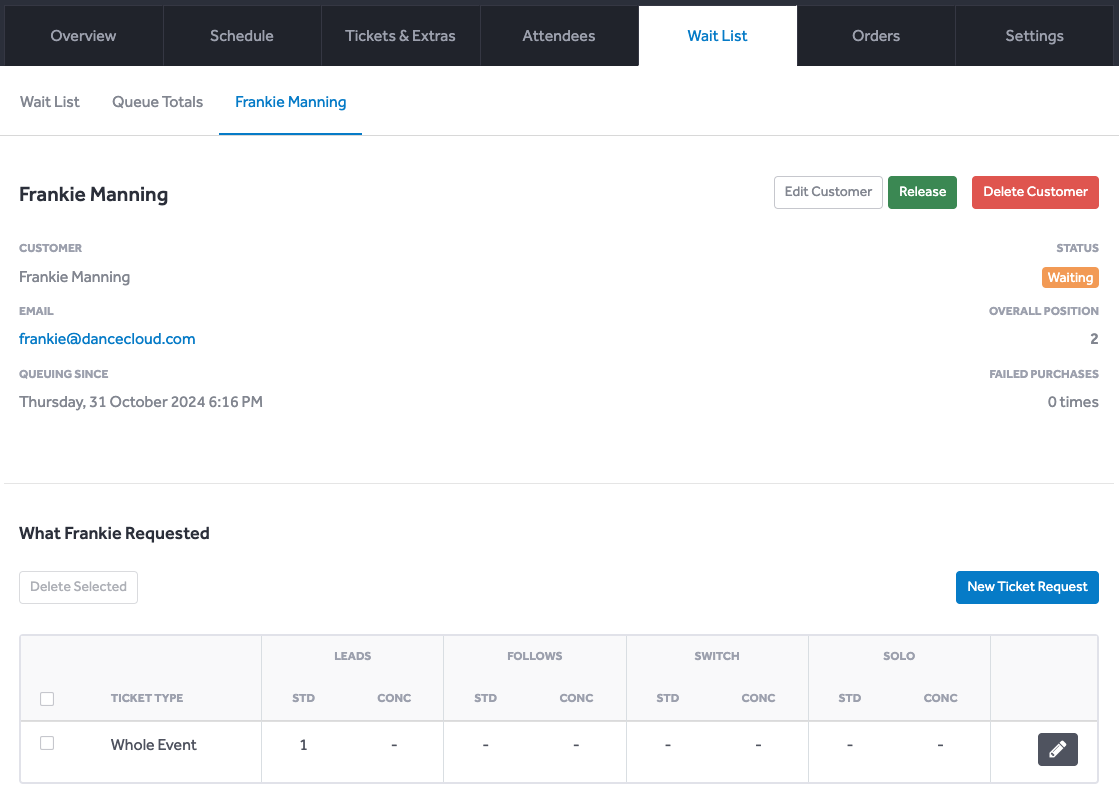
To view an applicant's details, click on their row when viewing the wait-list. This will show the applicant's details:

Contact Details
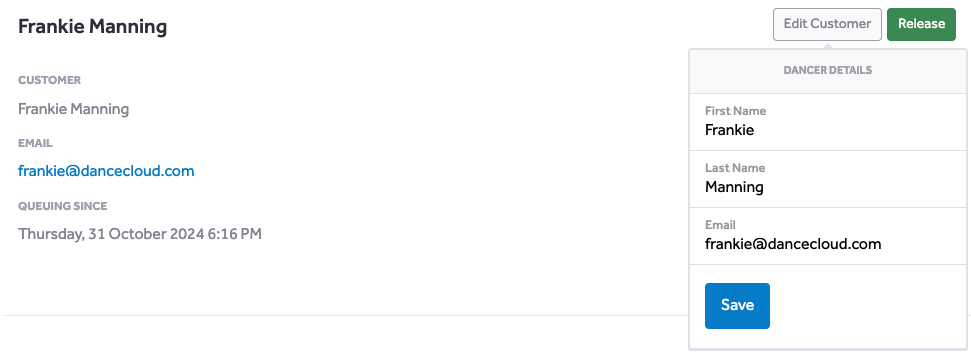
To edit the name and email address of an applicant, click on the Edit Customer button on the applicant's page. This will open a form where you can edit the applicant's details:

Requested Tickets
In the What [Customer] Requested section, you can see the tickets the applicant requested:

If needed, you can edit the requested tickets. Click the edit icon on the row you wish to edit. You will be shown a form where you can specify the ticket type requested, and how many tickets of each role are needed.
You can add more rows for different ticket types by clicking the New Ticket Request button. Select the ticket type, then how many tickets of each row are needed.
If you need to remove any rows of ticket requests, use the checkbox on the left of the row to select it. Then click the Delete Selected button. You will be prompted to confirm the deletion.
Releasing Tickets
You can choose to manually release tickets to an applicant if you wish.
INFO
When you release tickets to an applicant, they will be able to purchase all the tickets they requested. So, if there are multiple tickets in the What [Customer] Requested section, they will be issued all of them.
To release tickets to an applicant, click the green Release button at the top of the applicant's page. You will be prompted to confirm that you want to release the tickets.
TIP
No green release button? It is hidden if the applicant has no requested tickets.
DANGER
Releasing tickets to an applicant will immediately email them with a link to purchase the tickets. You cannot undo this action.
Once you've released the tickets, the page will change from displaying what the applicant requested, to what tickets they have been issued for purchase:

If needed, you can make some changes after the tickets have been issued.
Changing the Expiry Date
When releasing tickets, DanceCloud will apply the default amount of time for the tickets to be held. This is between 24 and 48 hours, depending on how long it is until the event starts.
You can see the date that the tickets expire in the orange button. Click the button to change the expiry date.
WARNING
When DanceCloud emails the applicant saying tickets have been issued, it will include the expiry date. If you change the expiry date, the applicant will not be notified of the change.
It is best not to shorten the expiry date as this may cause the applicant to miss out on purchasing the tickets.
Editing Issued Tickets
To edit an issued ticket, click the edit icon on the row you wish to edit. You will be shown a form where you can specify the ticket type issued, and the role it is for.
To add an additional ticket, click the Add Ticket button. Select the ticket type, then the role it is for.
To remove tickets, use the checkbox on the left of the row to select it. Then click the Delete Selected button. You will be prompted to confirm the deletion.
Suspended Applicants
Applicants are suspended from the wait-list if they have been issued tickets twice, but have not purchased them before the expiry date on both occasions. You will see a prominent message if this is the case:

To unsuspend an applicant, click the orange Remove Suspension button. This will allow tickets to be released to them again.
DANGER
Applicants are suspended after two failed attempts because this is a sign that they are not interested in purchasing tickets. Suspending them prevents DanceCloud from repeatedly emailing them unnecessarily.
We do not recommend removing the suspension unless you are in contact with the applicant and they have indicated that they are still interested in purchasing tickets.
Deleting Applicants
If you need to remove an applicant from the wait-list, click the red Delete button at the top of the applicant's page. You will be prompted to confirm the deletion.