Event Management
Managing Attendees
In this chapter, we cover how to manage attendees at your dance event.
Your Attendees
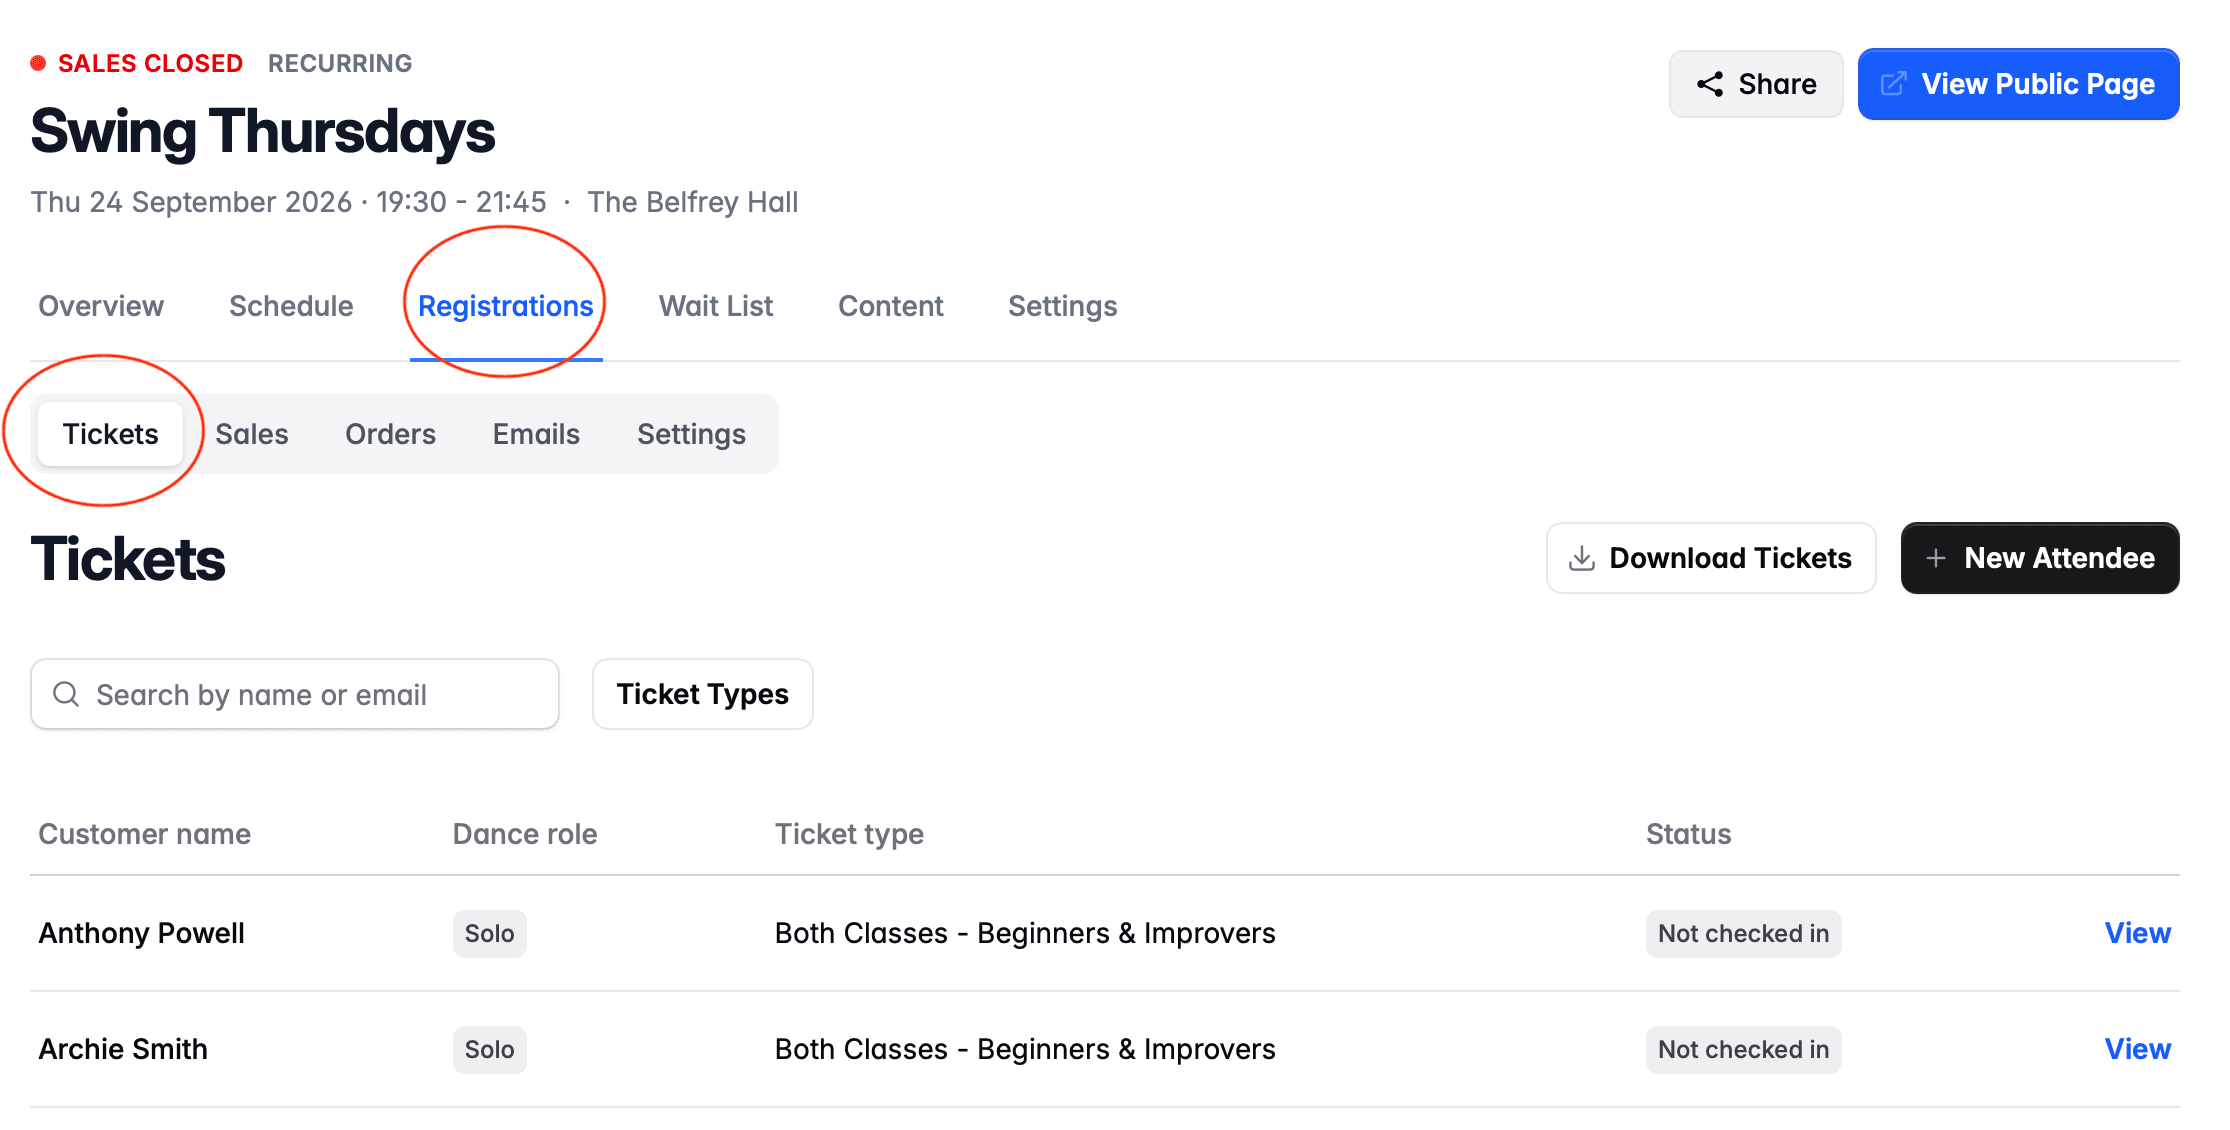
To view attendees at your event, navigate to the event page in your organiser account and click on the Registrations tab. Here you will see a list of tickets sold for your event:
Adding Attendees
Non-Paying Attendees
To add a non-paying attendee to your event, use the New Attendee button.
You will be able to search your existing customers to find their details. Existing customers appear in the search results if they have previously purchased a ticket. Click on the row to use their details.
If you cannot find the person, use the Enter customer details button to manually enter the customer details.
Select the Ticket Type that the person is being admitted with. Then click Create Ticket.
The ticket will be created with no role, i.e. not lead or follow. See Editing Details below for how to change the role, for example to set them as a lead or a follow.
When adding a new attendee, DanceCloud will email them their ticket information.
Paying Attendees
To add an attendee that needs to pay for their ticket, first add them to your wait-list, then release tickets to them. They will receive an email containing a payment link.
Editing Details
To find an attendee, use the search box. You can search by name or email.
To view an attendee's details, click on their row in the table. This will show the attendee's details:
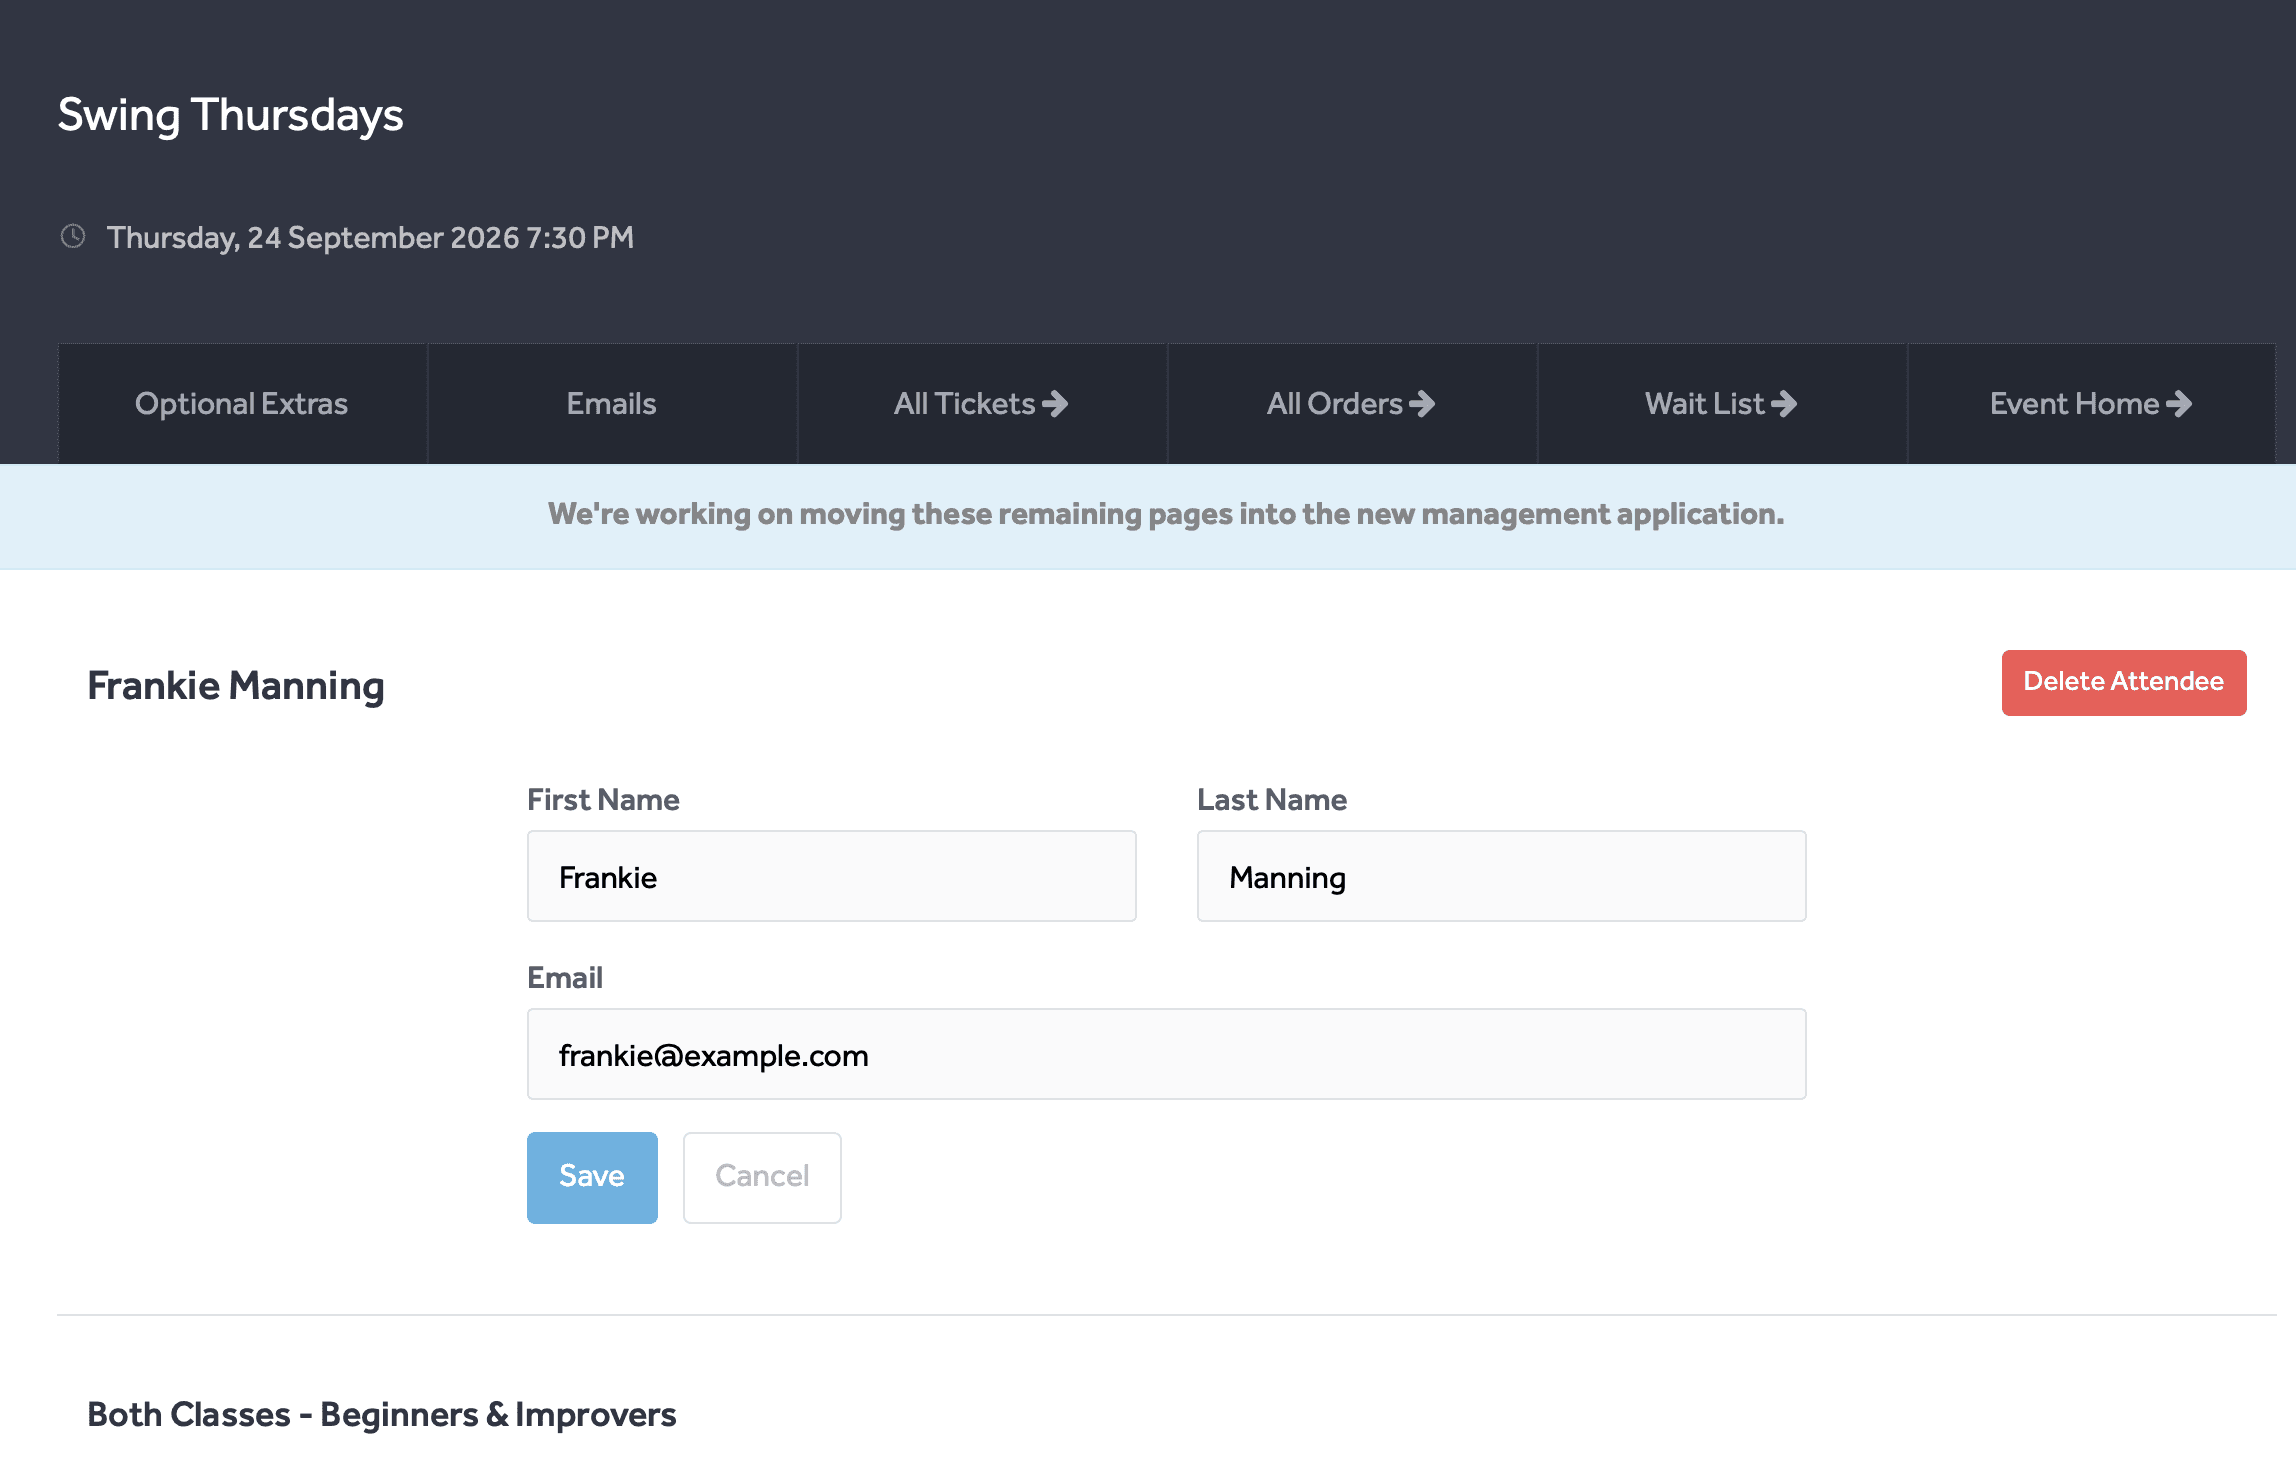
The All Tickets tab will take you back to the tickets list.
Contact Details
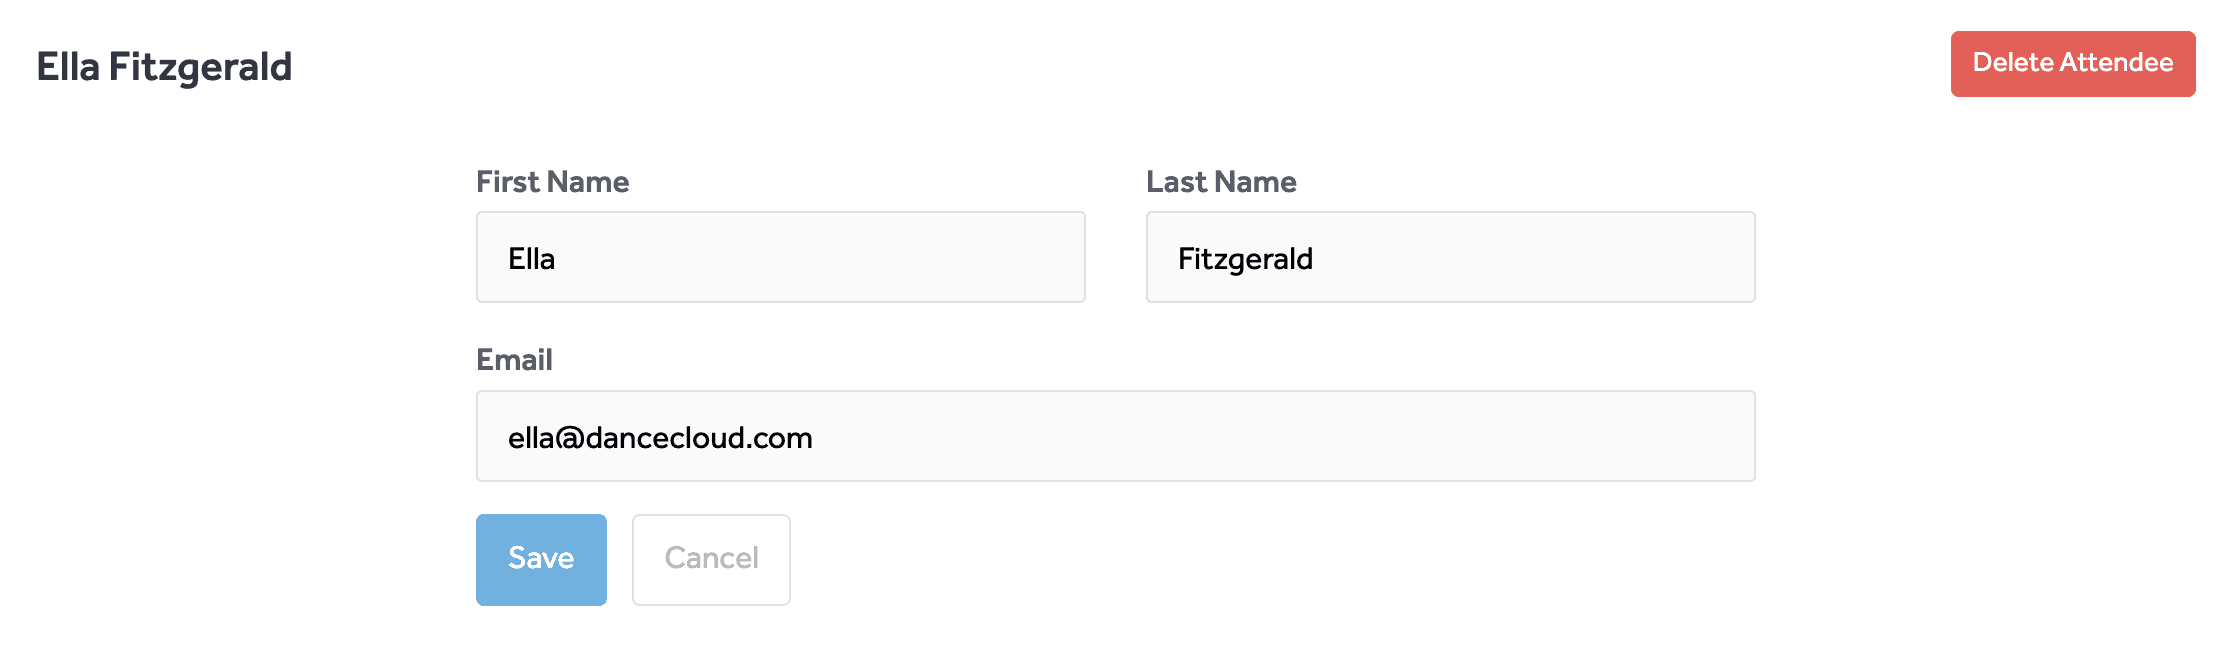
To edit the name and email address of an attendee, use the form at the top of the page.
If the email address changes, DanceCloud will email the attendee their ticket information at the new address.
Ticket Type
At the bottom of the attendee page, DanceCloud shows the activities at your event that they are attending. This is based on the ticket type.
To change the ticket type, use the Change Ticket Type button, which opens a form for you to select the new ticket type:
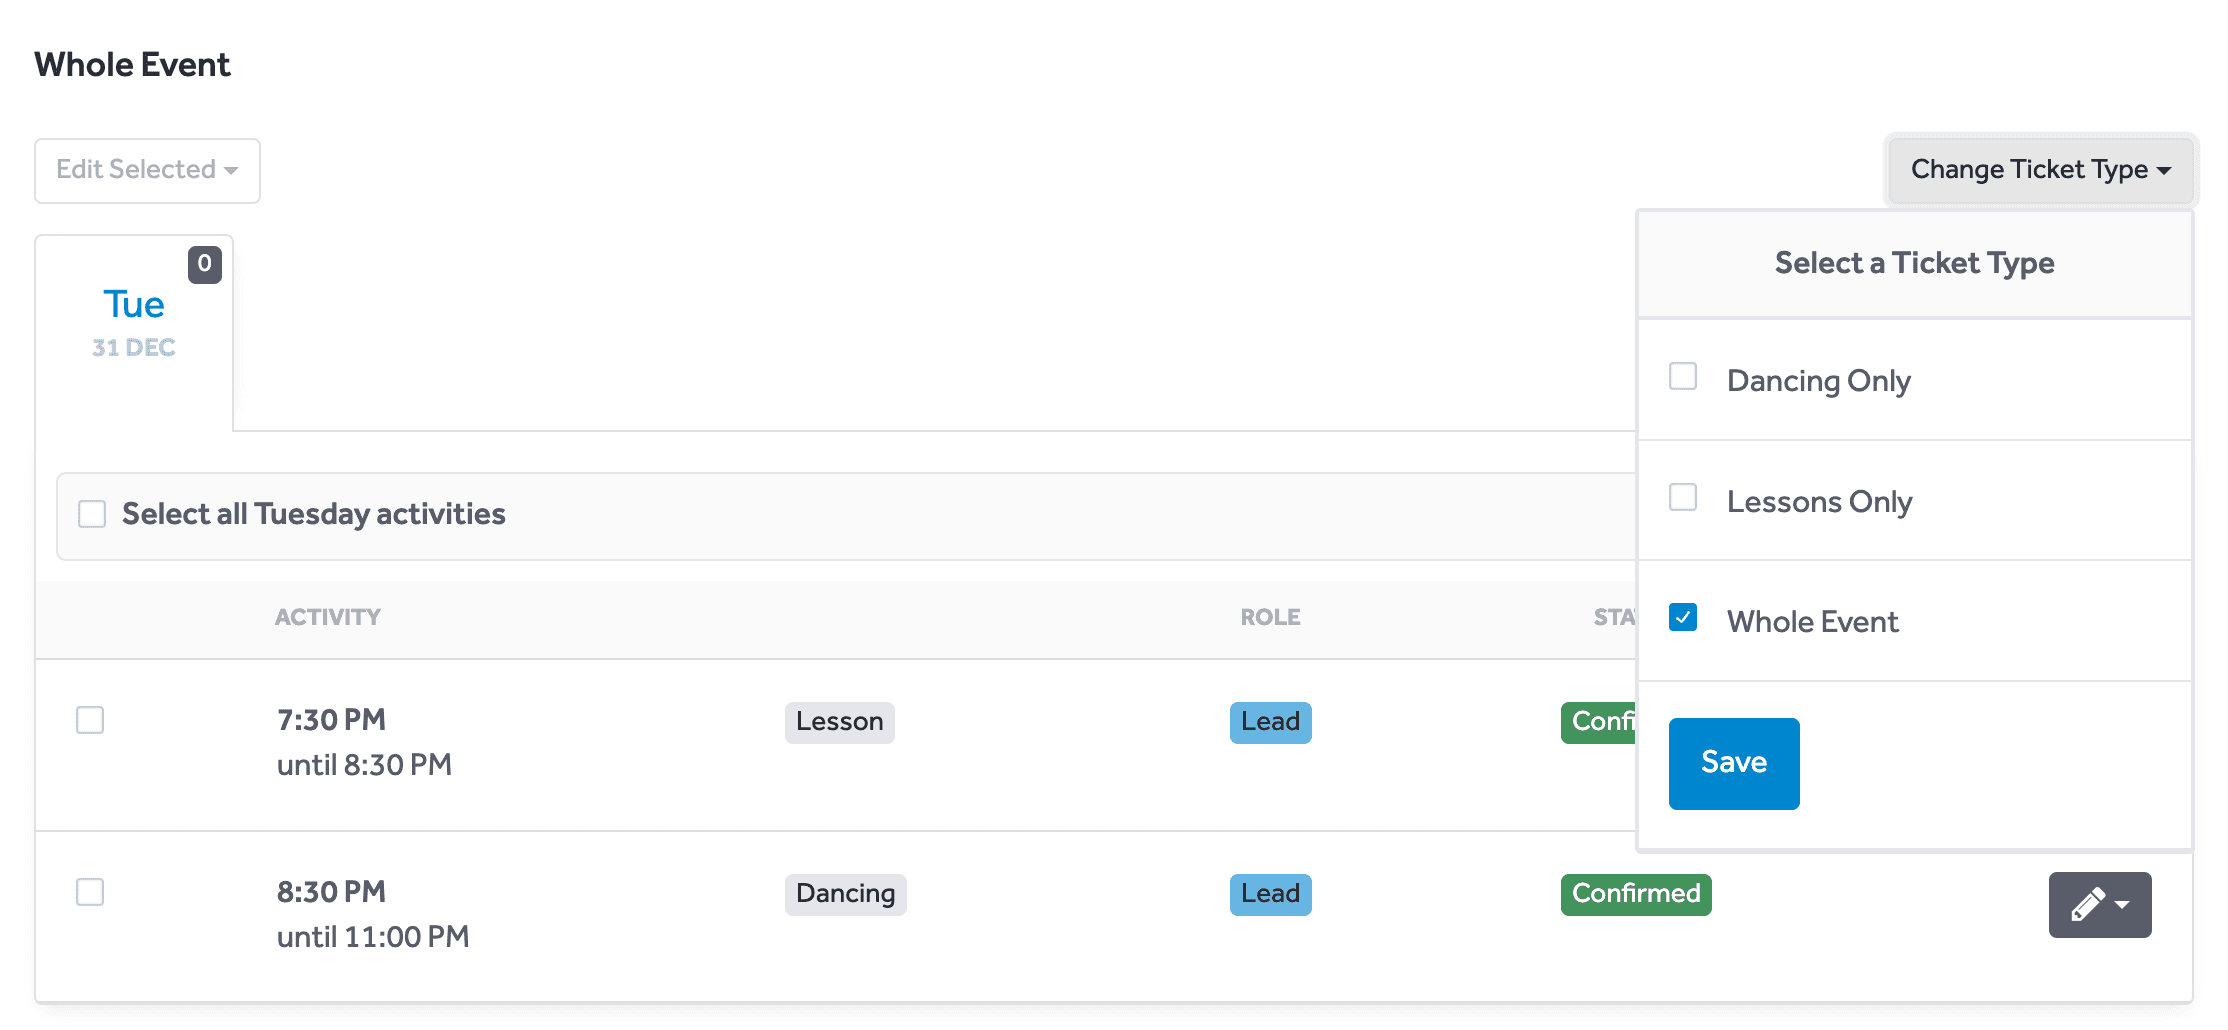
When the ticket type changes, DanceCloud will email the attendee with their updated ticket information.
Role
The role an attendee will dance is specified per-activity. This is shown in the schedule of activities at the bottom of their page.
To edit the role for an activity, use the edit button at the right of the row you need to change:
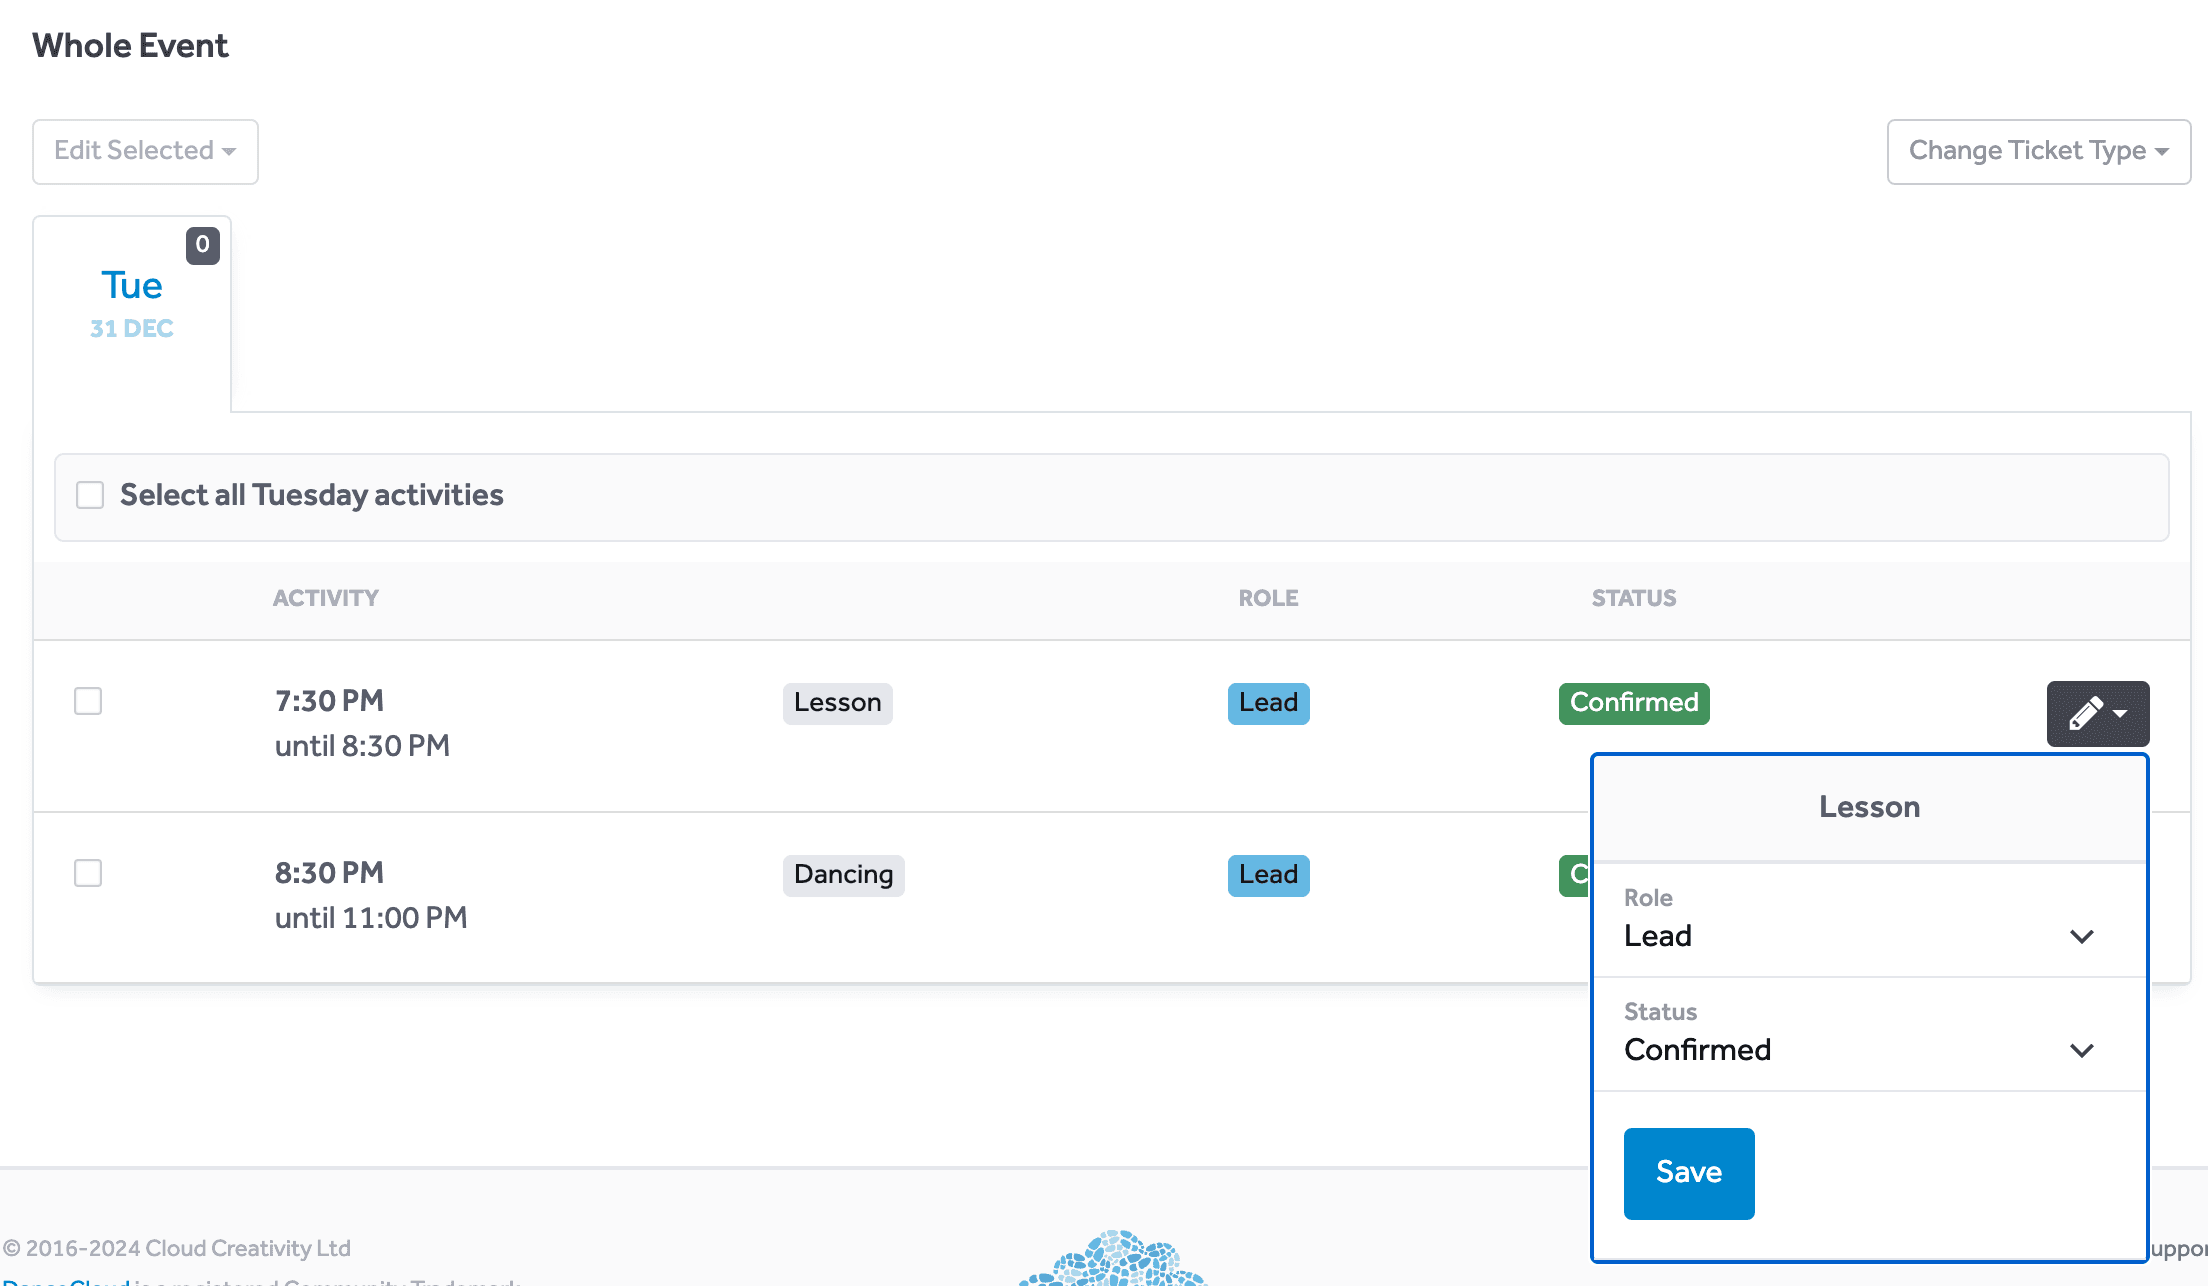
Alternatively you can edit multiple activities at once. Select the rows using the checkbox on the left, then use the Edit Selected button above the schedule.
Cancellations
You can mark attendees as cancelled in the schedule section of their page. Cancellations are per-activity. I.e. you can mark some or all of the attendee's activities as cancelled.
Choose the activities from the schedule that you need to cancel using the checkbox on the left of the activity's row. You can select multiple at once.
Then use the Edit Selected button, then change the status from Confirmed to Cancelled:
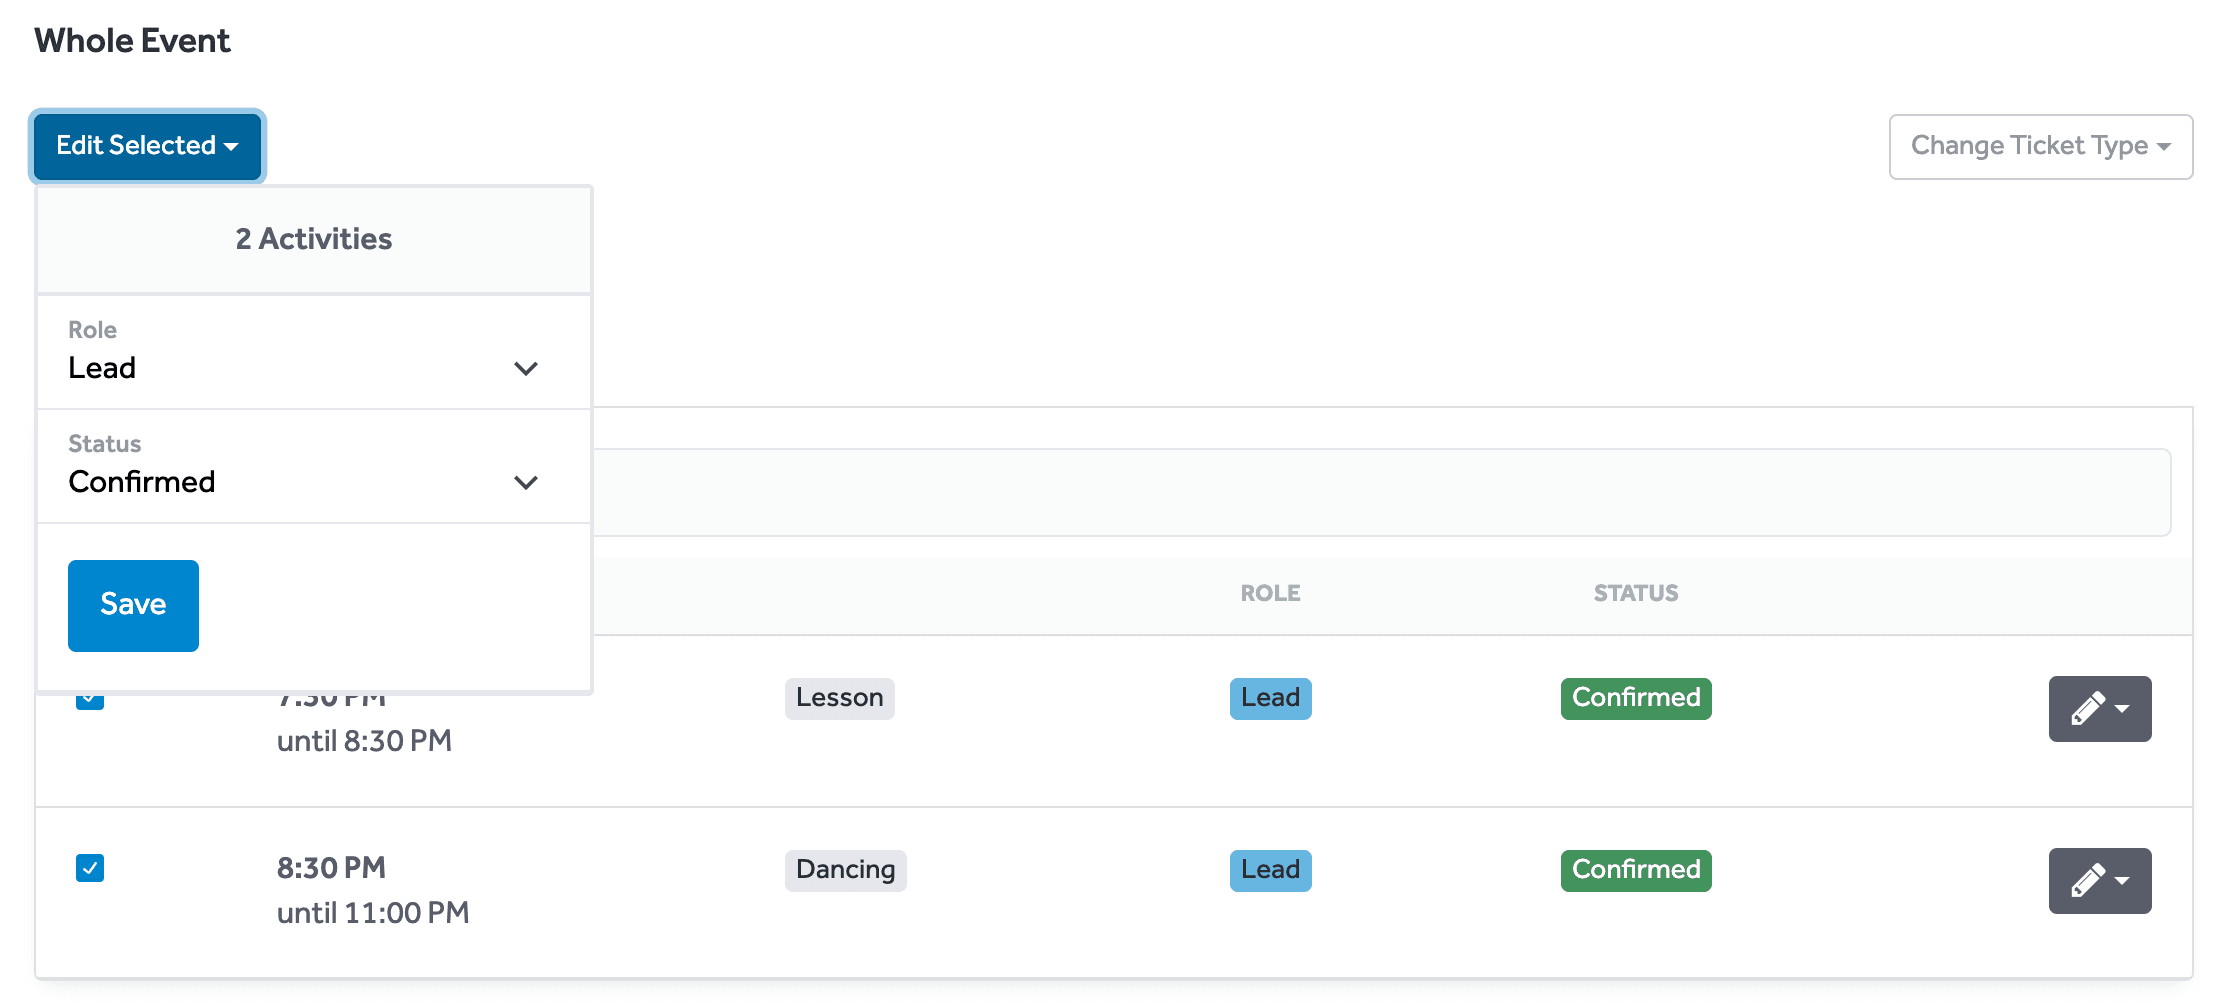
Alternatively, if you only need to edit one activity, use the edit button on the right of the row that you need to change.
Refunds
If you need to issue a refund because of the cancellation, see the Refunds chapter.
Deleting Attendees
You can only delete non-paying attendees. For paying attendees, use cancellations instead (as described above).
If an attendee can be deleted, a red delete button will be shown at the top of their page. Use that, and you'll be prompted to confirm the deletion: