Listing Events
Schedule
In this chapter we'll cover creating your event schedule - the activities that dancers can participate in at your event.
What is the Schedule?
In DanceCloud, every event has a schedule of activities. These are the different activities that a dancer attending your event can participate in.
Some events might just have one activity - for example, if you were organising a Tea Dance it is likely to consist of a single social dance.
However, other events might have multiple activities. A weekly class might comprise of two lessons - a beginners and an intermediates lesson. While a weekend event might comprise of a workshop during the day and a social dance in the evening.
If you plan to ticket your event on DanceCloud, it is important that you accurately create your schedule before setting up ticket types. This is because ticket types determine which activities on the schedule a customer is admitted to when they purchase a ticket.
Why is a Schedule Used?
DanceCloud needs to understand the activities at your event for a few reasons:
- To help dancers find the things they are looking for. The schedule allows a dancer to search by type of event ("learning" vs "dancing"), dance styles, levels, location, etc.
- As events can span many days, for example a 4-week course, the dates of each activity help us match your event to the date that a dancer is searching by.
- Ensuring that registration settings, such as capacity and balance, can be configured per activity. We'll cover that in the registration chapters.
Schedule Start/End Dates
Every activity you create must fall between the start and end date that you entered on the Event Info step. These are shown on the schedule:
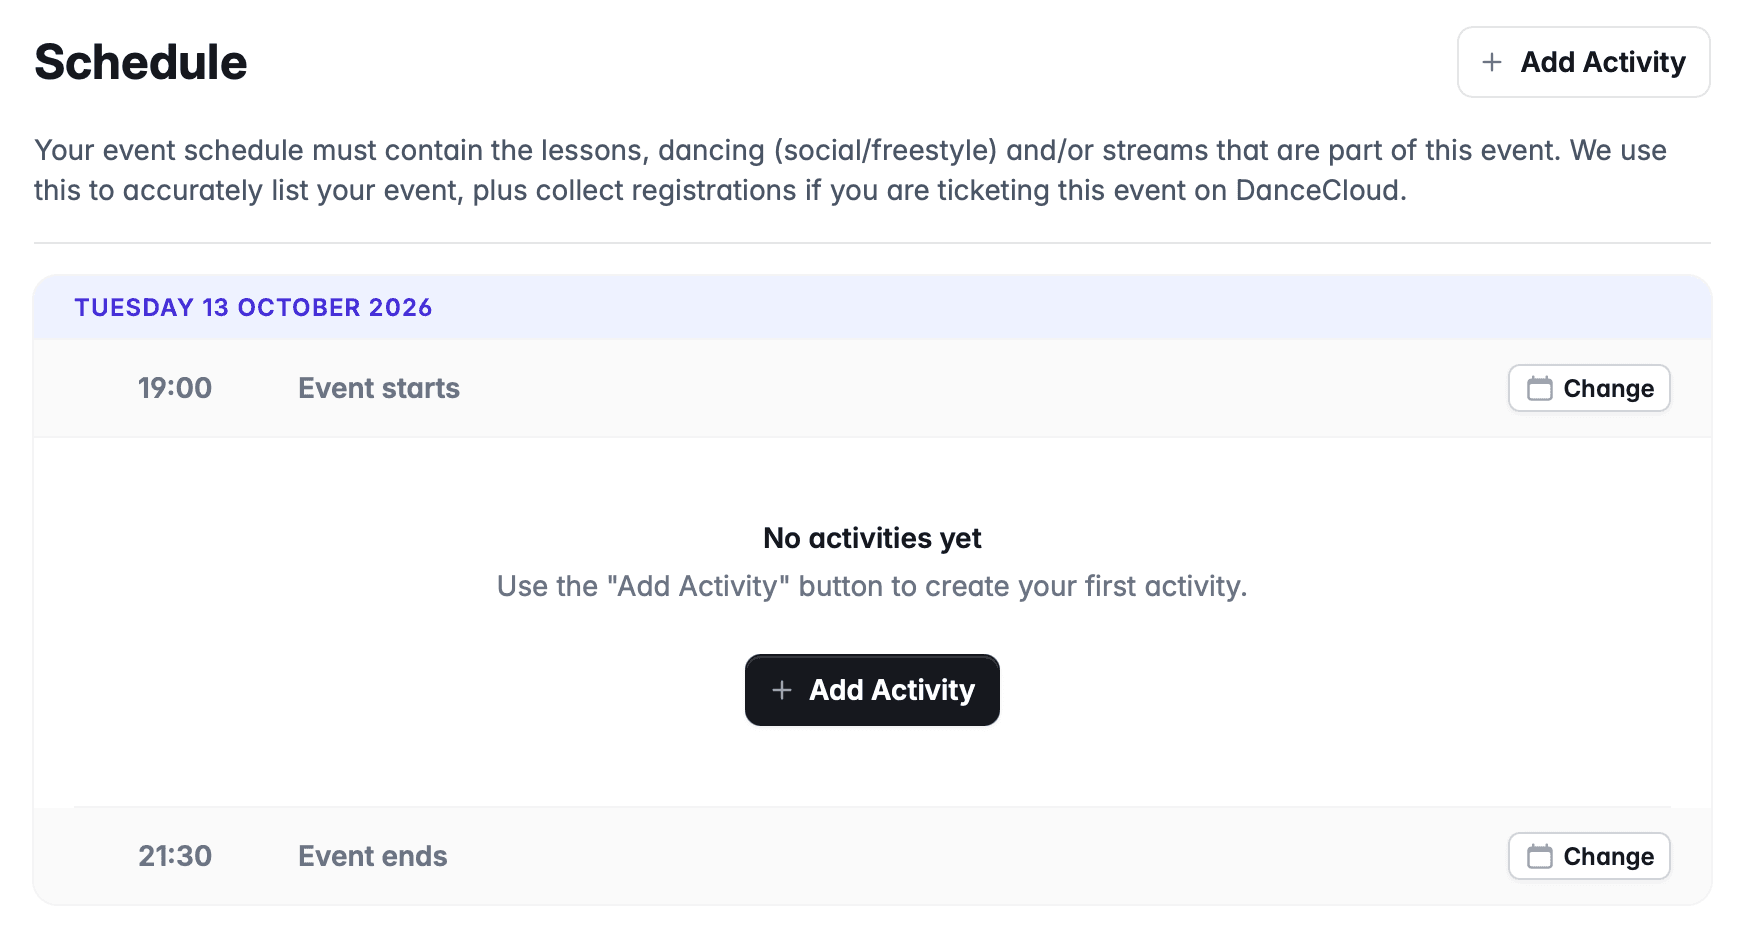
If you need to adjust the start or end date/time, use the Change button on either the start or the end rows.
Creating a recurring event?
If your event is recurring, only create the schedule for the first event in the series. For example, if you are creating a weekly class, then you only need to add the activities for the first week - not every week in the series.
When you publish the recurring event, DanceCloud will replicate the schedule to each occurrence of your recurring event.
Creating Activities
On the Schedule step when creating your event, use the Add Activity button to create an activity.
This takes you to the Create Activity form, where you need to fill in the following fields:
Date & Times
Enter the date of the activity, and its start and finish times.
As activities must be less than 24 hours, the finish time is always interpreted within that 24 hours. So, for example if you create a late night Blues social that starts at 23:00 and ends at 02:00, DanceCloud knows that this is 2am on the next day.
Title
This is the title of the activity that is displayed to dancers. This allows you to describe it however you want - e.g. "Beginners Salsa Class" or "All-Levels Social".
Activity Type
Choose one of the three activity types:
- Lesson - use this for classes at your event when your event does not have streams.
- Streamed Lesson - use this for classes at an event that does have streams. Each streamed lesson must be assigned to a stream. Typically these are used for large events such as weekenders or festivals.
- Social Dance, Free-Style, Ball - whatever you call it, this is when dancers get to strut their stuff on the dance floor!
Activity types are important for how DanceCloud classifies your event and matches it when dancers search. Ensure you choose the correct type.
Dance Style
Select a dance style for your activity. This helps dancers find events in the style they want to dance.
The box will show recent dance styles you've used. Otherwise, search for a dance style by typing.
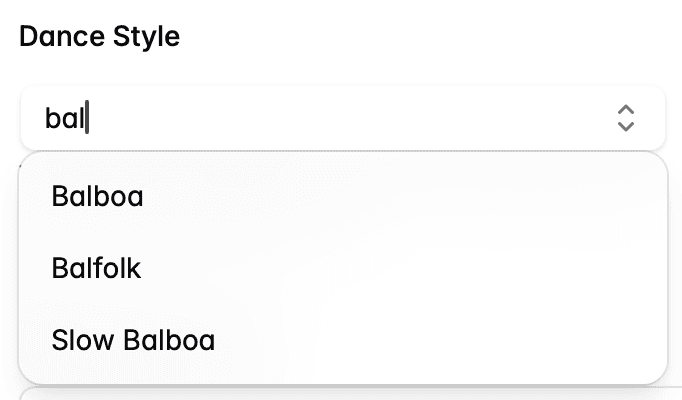
We've tried to capture all dance styles for you to select. If you cannot find the one you want to use, please contact us so we can update the list.
Experience Levels
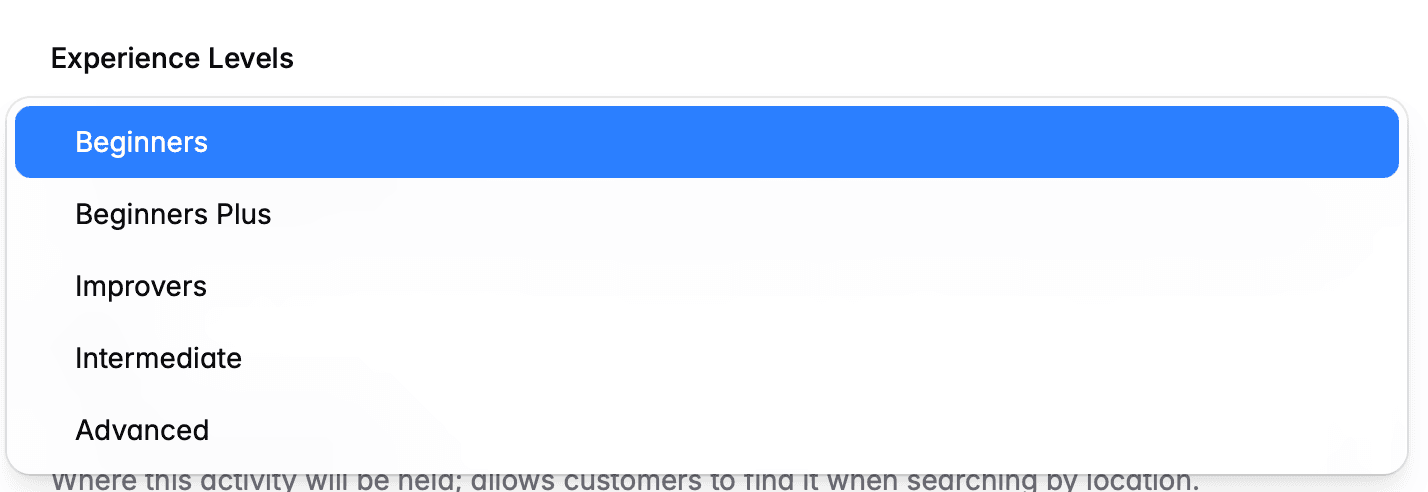
If you select Lesson, you'll be asked to provide the Experience Levels for the lesson. You will need to have defined your levels on the Levels page.
Select from the list. You can select multiple levels if your lesson caters for multiple levels. However, be accurate: this is used when dancers search for lessons at a specific level, and it can be frustrating if their results include lessons that are not strictly for the level they are seeking.
Stream
If you selected Streamed Lesson, you will be asked to select or create the stream.
For example, if you were running a Festival with Gold, Silver and Bronze streams, you would need to create activities for each stream.
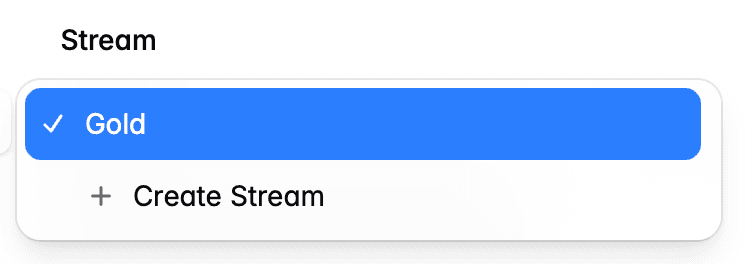
Choosing Create Stream will open a drawer. Provide the following information about your stream:
- Name: the name you are using for this stream, displayed to dancers.
- Description: e.g. a description of the expected level for this stream, or the content that it would cover. Helps a dancer distinguish between the different streams.
- Experience Levels: these are optional - if the stream is for specific levels that you normally teach, choose them here. If your streams do not relate to levels - e.g. if they are thematic - then you do not need to choose them here.
Venue
Select the venue where the activity will be held - or create it if you have not previously listed an event at that venue. Venues are used when dancers search for events by location.
The venue field will show recent venues you've tagged activities with, or you can type to find a specific one you've entered before.
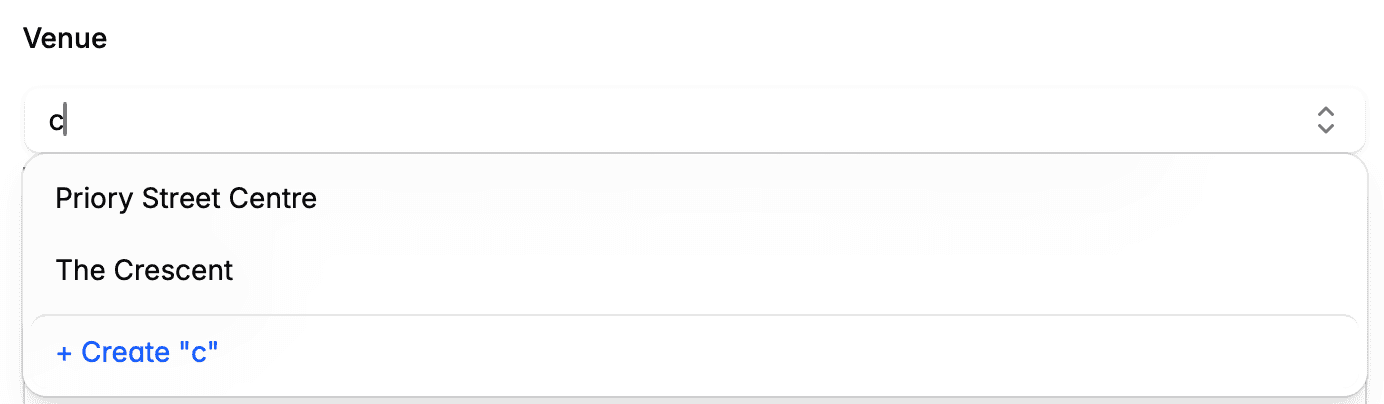
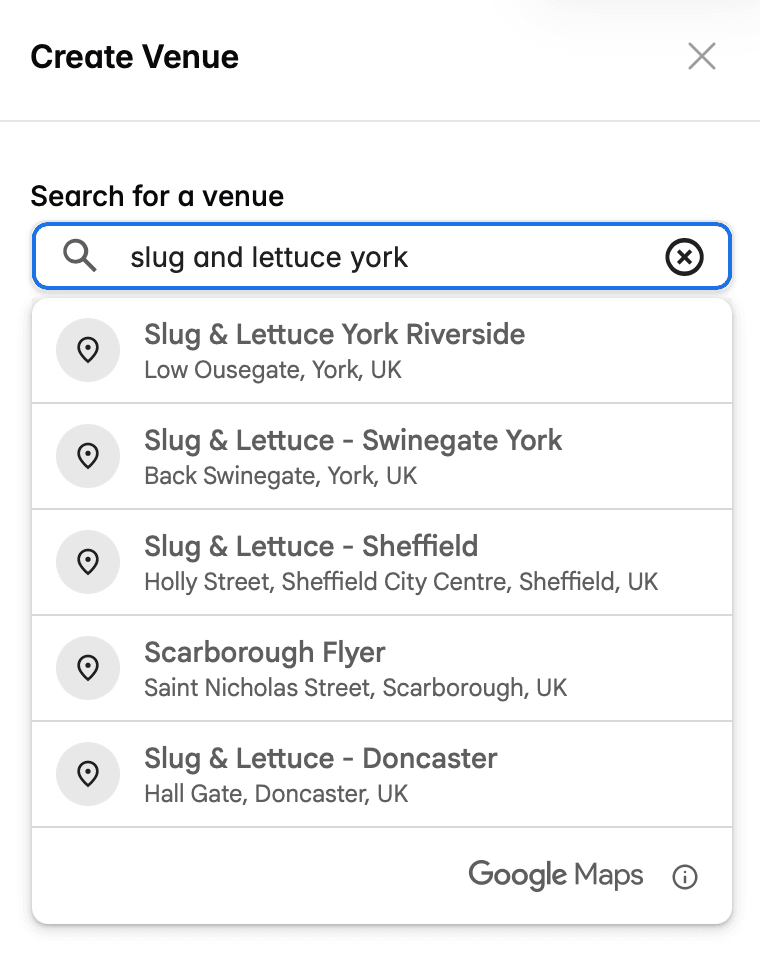
Choose the Create option if you need to create a venue you haven't used before. This will open a drawer where you can search using Google Maps to find the venue.
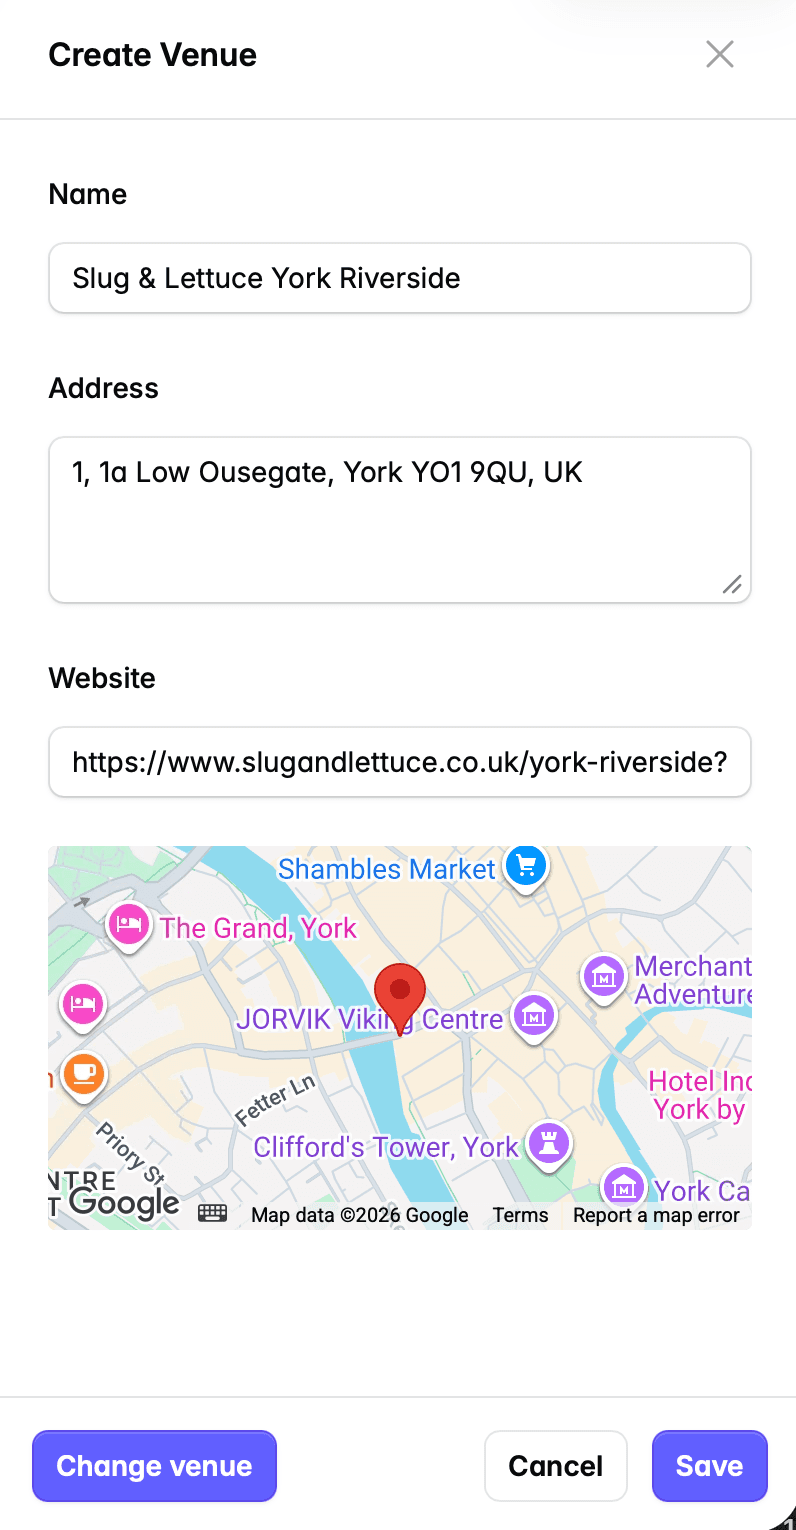
After selecting the venue from Google Maps, edit any information you may want to change, then click Save. Use the Change venue button if you want to go back to searching Google Maps.
What if I do not know the venue yet?
In this case, choose a location from Google Maps. E.g. if you're running the event in York but do not yet know the venue, you can choose "York" from Google Maps as the venue. You can then edit it later, once you know the venue.
If you do not choose a venue, dancers will not be able to find your event when searching by location. Therefore, it is recommended to use a city or town as the location until you know the exact venue.
Short Description
This is an optional description of this specific activity. This will be shown to dancers when they view your schedule in DanceCloud Listings.
Copying Activities
Once an activity is created, you can choose to copy it to other dates and times at your event. This is useful when creating repetitive activities.
For example, imagine you are creating a 4-week course. You would create the first lesson in your schedule, then copy it to the additional three dates.
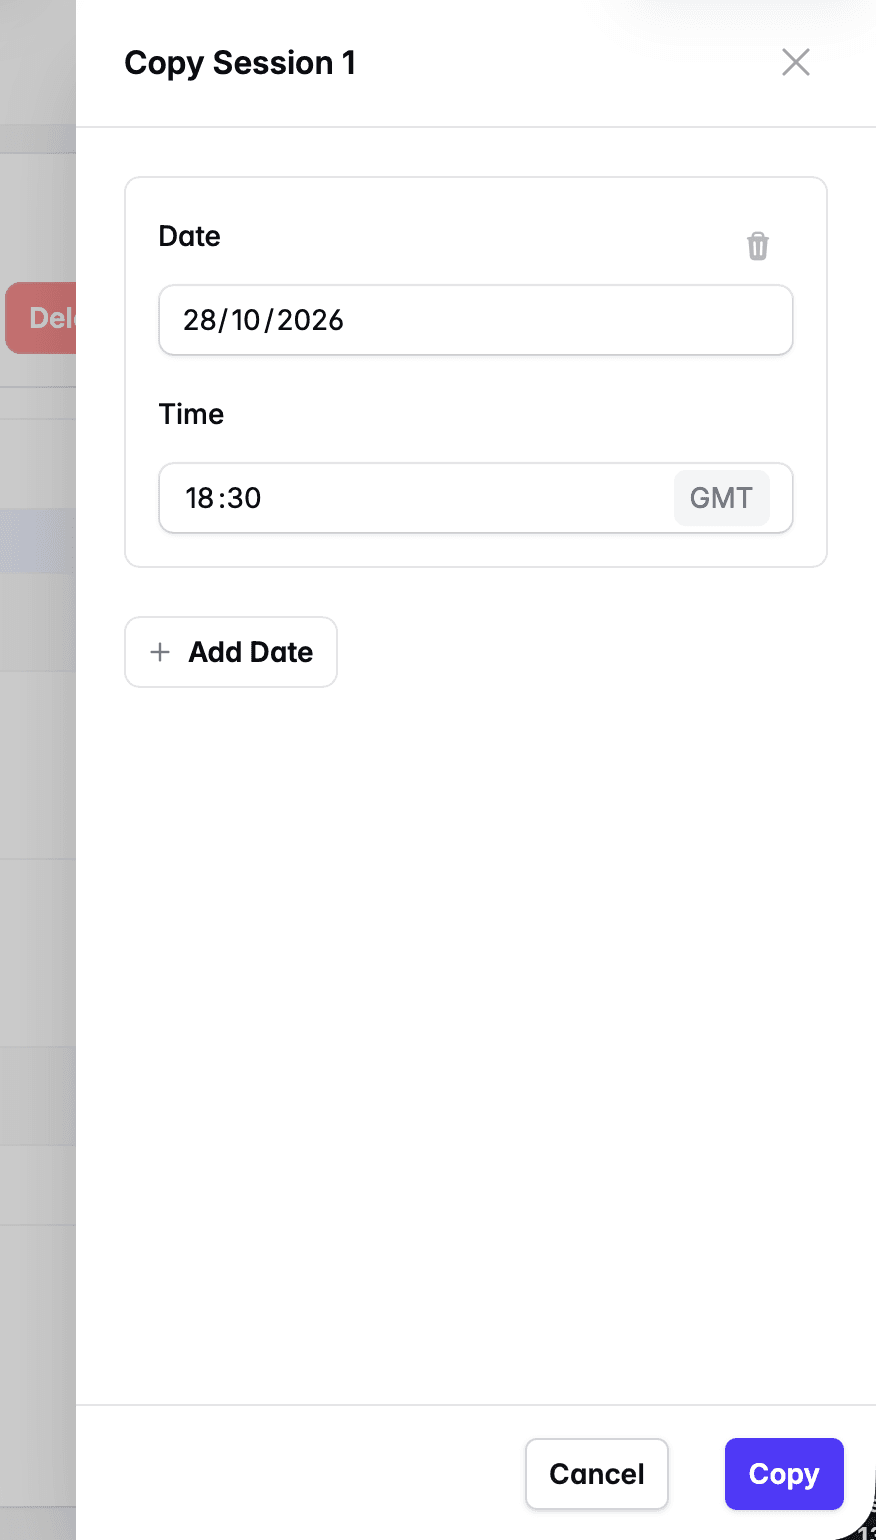
Use the copy button on the row of the activity you want to copy. It is the copy icon on the right hand side of the row.
This opens a drawer that allows you to choose one or more dates to copy the activity to. Once you've copied the activity, you can edit any of its copies if you need to change anything (e.g. title, description).
Editing Activities
If you need to change any settings on an activity after creating it, click the row in the schedule. This will return you to the form, where you can edit anything you previously selected.
Deleting Activities
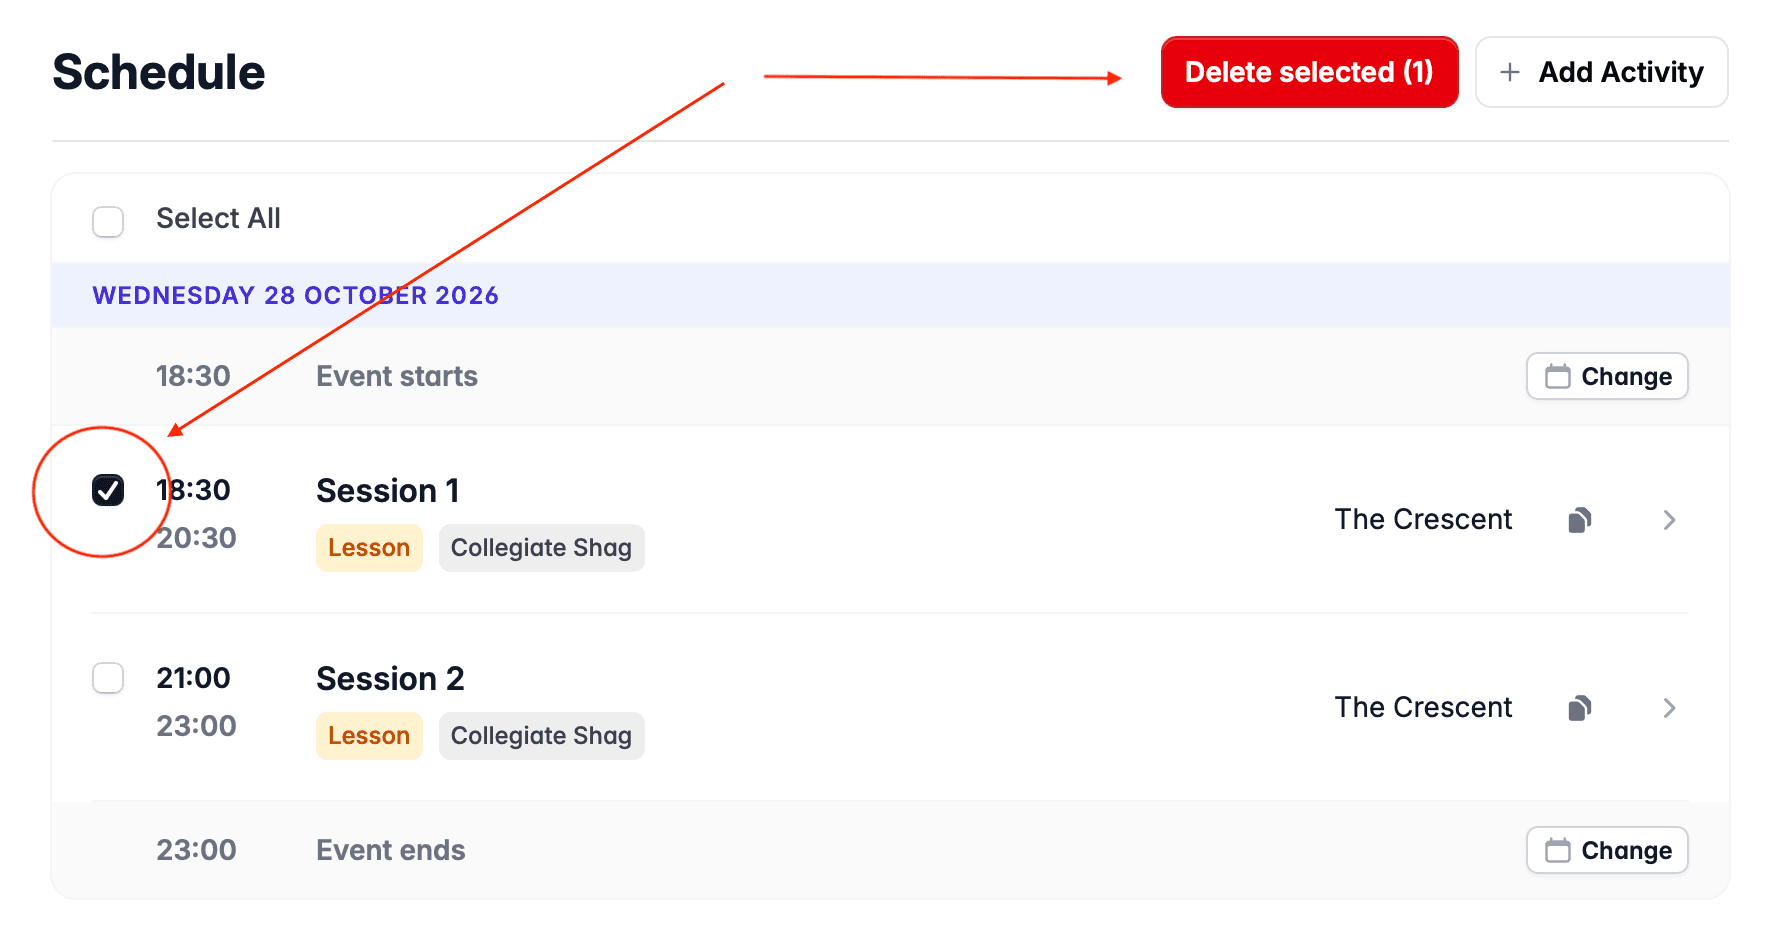
To delete an activity or activities, select the rows you want to delete by clicking the checkbox on the left of the row. Once selected, use the Delete Selected button to delete the activities. You will be prompted to confirm you want to delete the selected activities.
There is also a Select All checkbox at the top of the schedule; for example, if you needed to delete all activities.
Deleting an activity cannot be reversed.
Streams
Creating & Editing Streams
Streams, aka tracks, are created when you create an activity - as described above.
If you added any streamed lessons to your schedule, a Streams tab will appear at the top of the page:
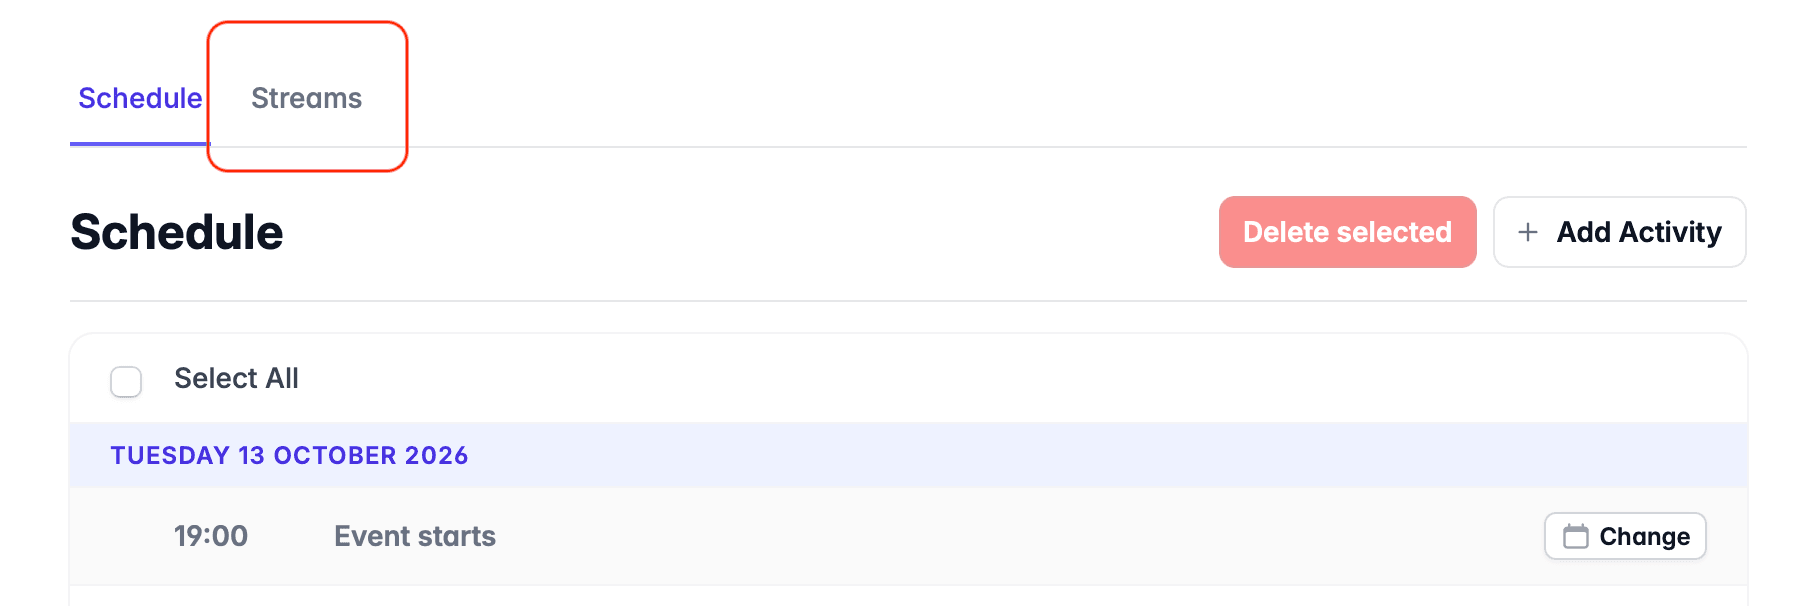
Clicking this will show you a list of your streams. You can go back to the schedule via the Schedule tab.
From the streams page, you can create additional streams and edit any you have already created. Click on the row to edit the stream.
Reordering Streams
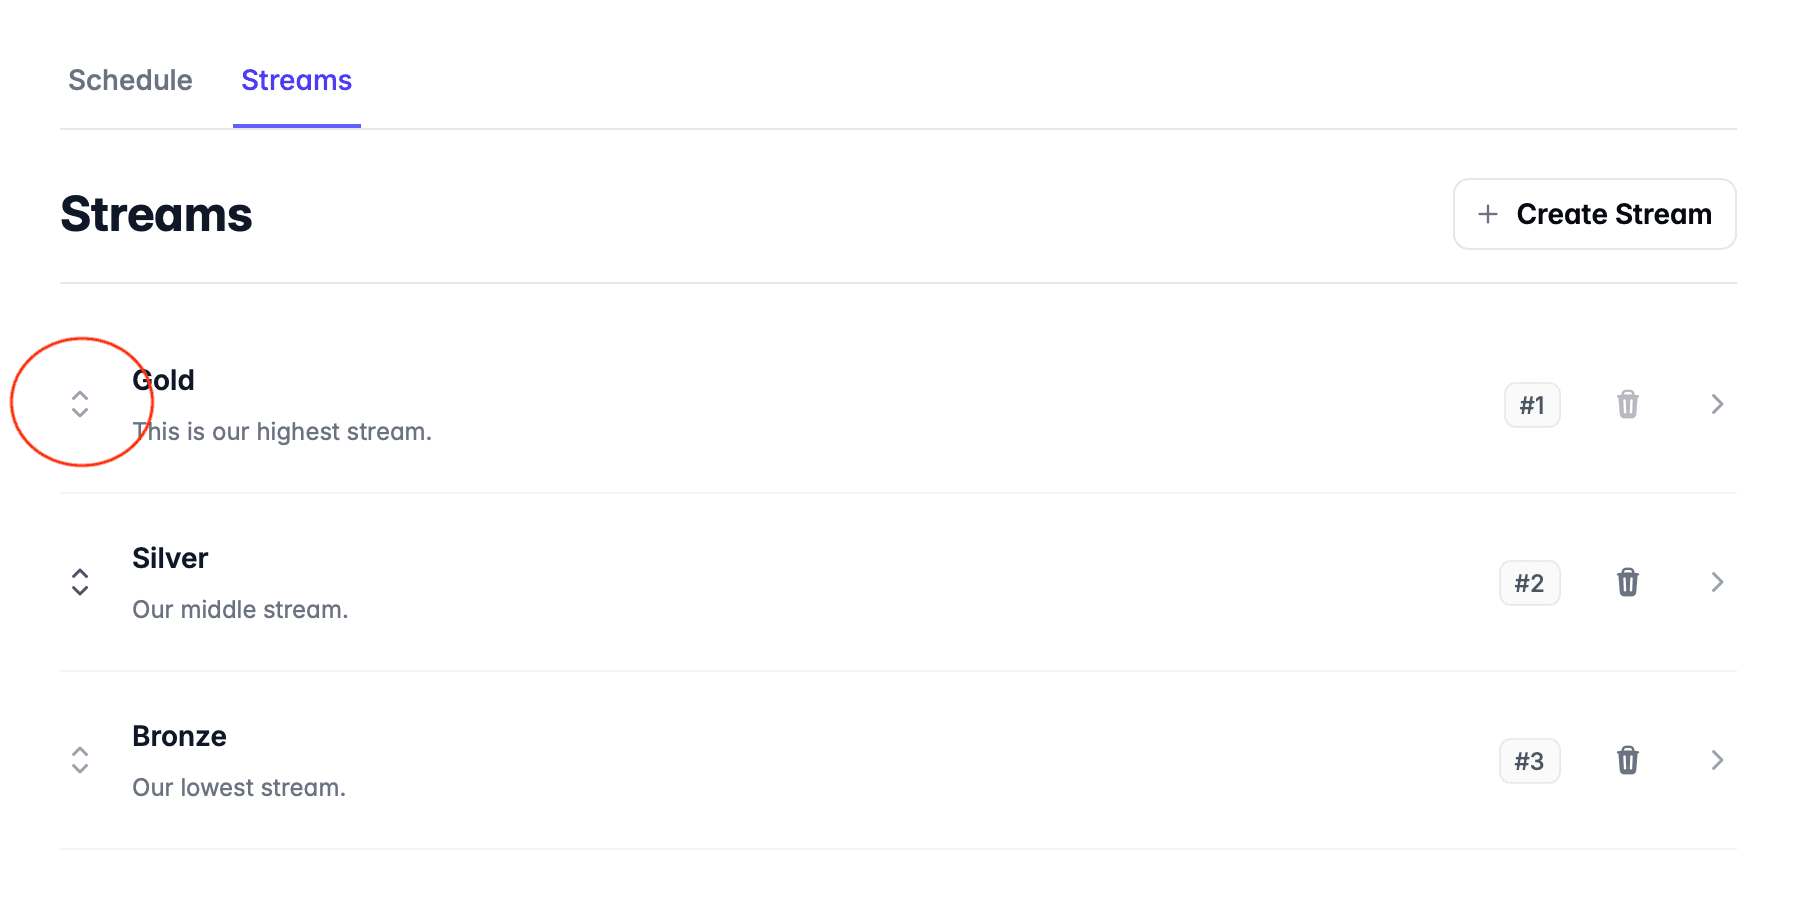
The streams will be displayed to dancers in the order they are displayed here. To reorder the streams, drag and drop them using the arrow symbols on the left hand side of the row.
Deleting Streams
As shown in the image above, the list of streams has a trash button on the right of the row of each stream. Click this to delete a stream - you will be prompted to confirm.
The delete button will be disabled if the stream is linked to any streamed lessons in your schedule. If you want to delete a stream that has lessons, delete the lessons first - then the stream.
What's Next?
In the next step, we'll choose how to handle registrations for the event.